Demolition work, while often a task best left to professionals, can be tackled effectively by ambitious DIYers with the right approach. Whether you’re renovating a room, removing a wall, or tearing down an old deck, understanding the essentials of demolition will ensure the job is done safely and efficiently. Here’s a comprehensive guide to help you through the DIY demolition process.
Preparation is Key for DIY Demolition
Before you dive into demolition, thorough preparation is crucial. Start by planning out your project carefully. Determine exactly what needs to be removed and how it will impact the surrounding areas. Removing a wall, for instance, might require additional structural support to avoid compromising the integrity of your home.
Inspect the area for hazards such as electrical wiring, plumbing, or gas lines. Identifying these elements early on will help you avoid accidents and ensure you take the necessary precautions. Before starting, make sure to turn off any utilities in the affected areas.
Safety First
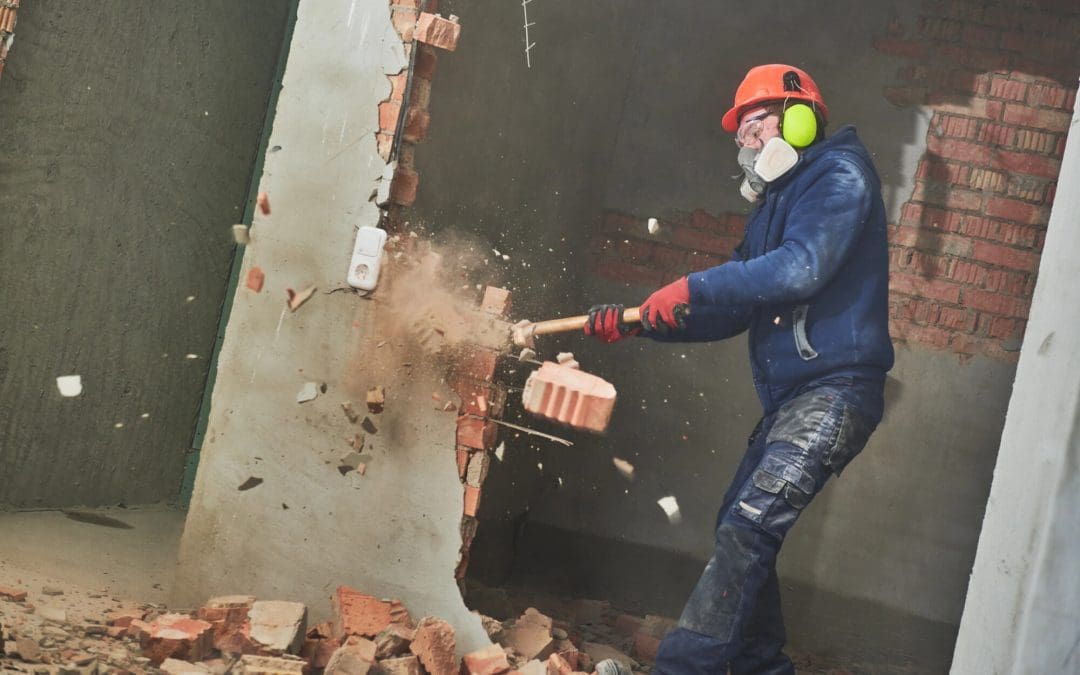
Safety should be your top priority during demolition work. Equip yourself with the right personal protective equipment (PPE) including safety goggles, heavy-duty gloves, and a dust mask. Depending on the scope of the project, consider wearing a hard hat and hearing protection as well.
Ensure the area is well-ventilated to minimize dust exposure. For large-scale demolitions, use a dust barrier to contain debris and protect other parts of your home. Clear the workspace of any unnecessary items to prevent injuries and ensure a smooth workflow.
Choosing the Right Tools for DIY Demolition
Having the right tools for the job makes demolition easier and more efficient. For basic tasks, a sledgehammer, pry bar, and reciprocating saw should cover most needs. A sledgehammer is effective for breaking up materials, while a pry bar helps remove nails and dislodge boards. A reciprocating saw is useful for cutting through more substantial materials such as wood or metal.
For more extensive demolition, you might need additional tools like a jackhammer or a circular saw. Renting specialized equipment can be a cost-effective way to tackle more challenging aspects of the project without investing in tools you may only use once.
Demolition Techniques
When executing the demolition, start with the most manageable parts first. For wall demolition, begin by removing any fixtures, fittings, and trim. Cut through drywall carefully to avoid damaging underlying structures. If you’re dealing with load-bearing walls, consult a structural engineer before proceeding.
For flooring, remove baseboards or moldings first. Depending on the type of flooring, you may need to pry up nails or staples, or use a floor scraper to remove adhesive residues.
When dismantling larger structures like decks or sheds, it’s often best to work from the top down. This method helps control the debris and makes the process more manageable. Ensure you have a clear plan for disposing of the debris as you work.
Disposing of Debris
Proper disposal of demolition debris is essential for a clean and environmentally responsible project. Check with your local waste management authorities for regulations and disposal options. Many areas offer special services for construction and demolition waste.
Consider renting a dumpster to manage large quantities of debris. This will keep your workspace organized and prevent clutter from slowing down your progress. If the materials are recyclable or reusable, separate them accordingly and take them to the appropriate facilities.
Final Touches for DIY Demolition
After completing the demolition, thoroughly inspect the area for any remaining debris or potential safety hazards. Ensure that all utilities are properly capped and that any structural changes are addressed before proceeding with the next phase of your project.
Clean up the area meticulously to prepare for the next steps in your renovation. A well-executed demolition sets the stage for a successful project, so take your time to ensure everything is done correctly.
DIY demolition can be rewarding when approached with careful planning and the right techniques. You can tackle your project confidently and successfully by preparing adequately, prioritizing safety, and employing effective demolition techniques.
FAQs
Do I need a permit for DIY demolition work?
Yes, depending on the scope of your demolition, you may need a permit. If you’re taking down walls, removing large structures like decks, or demolishing anything that could affect your home’s structural integrity, check with your local building authority. Failing to obtain a permit when needed can result in fines and delays in future projects.
What should I do if I discover asbestos or lead paint during demolition?
Stop immediately if you encounter materials that may contain asbestos or lead-based paint. Both materials pose serious health risks if disturbed. Contact a certified professional to test and remove these hazardous materials safely. DIY removal without proper precautions can result in dangerous exposure.
What are the common mistakes to avoid in DIY demolition?
One common mistake is not preparing the site correctly, such as failing to identify utility lines before starting. Another is trying to demolish everything at once. Working methodically and starting with smaller sections is always better. Additionally, underestimating the amount of debris or the need for proper disposal is a frequent oversight. Lastly, avoid working without the right safety gear, which can lead to injuries.
How can I prevent dust from spreading to other parts of the house?
Containing dust is crucial to keeping the rest of your home clean. Use plastic sheeting to seal off the work area, including doorways and windows. You can also install a zipper door on the plastic barrier for easy access. Additionally, using a shop vacuum with a HEPA filter while you work will help capture airborne dust.
St. James Home Services provides inspections to customers in Durham and the surrounding areas of North Carolina. Contact us to request our services.

